
PHP is a server-side scripting programming language, and MySQL is an open-source relational database management system. These two frameworks, when used together, are capable of providing highly unique solutions, like creating a login form.
In this tutorial, you will look at a simple login system using PHP and MySQL.
Before getting started with the code-related aspects of PHP, let’s have a look at the prerequisites to create a login form.
Prerequisites:
- Knowledge of HTML, CSS, PHP, and MySQL
- Microsoft Visual Studio (For writing the code)
- Installation of XAMPP
Let’s start with the first topic, i.e., creating a PHP login form.
Step 1- Create a HTML PHP Login Form
To create a login form, follow the steps mentioned below:
- Open Microsoft Visual Studio -> create a new file and name it as an SL file
- Now, on a page, write the code mentioned in the example below
- The HTML program will create a webpage form that will allow users to log in themselves
The code consists of HTML elements. The basic elements are:
<title>
The element displays the heading of the document. The label can be only in the text format, and it shows the text in the browser's tab.
<link>
It creates a link between the working document and an external resource.
<form>
The element defines the user input included while creating an HTML.
<input type>
It displays a one-line input field.
<label>
It defines a label for many form elements. It majorly indicates the radio button/checkbox.
<!DOCTYPE html>
<html>
<head>
<title>LOGIN</title>
<link rel="stylesheet" type="text/css" href="style.css">
</head>
<body>
<form action="login.php" method="post">
<h2>LOGIN</h2>
<?php if (isset($_GET['error'])) { ?>
<p class="error"><?php echo $_GET['error']; ?></p>
<?php } ?>
<label>User Name</label>
<input type="text" name="uname" placeholder="User Name"><br>
<label>Password</label>
<input type="password" name="password" placeholder="Password"><br>
<button type="submit">Login</button>
</form>
</body>
</html>
Step 2: Create a CSS Code for Website Design
Next comes the CSS sheet. Now, the aim is to create a cascading style sheet (CSS) file to improve the design of the webpage.
The code for the .css file is below:
body {
background: #91a716;
display: flex;
justify-content: center;
align-items: center;
height: 100vh;
flex-direction: column;
}
*{
font-family: cursive;
box-sizing: padding-box;
}
form {
width: 1000px;
border: 3px solid rgb(177, 142, 142);
padding: 20px;
background: rgb(85, 54, 54);
border-radius: 20px;
}
h2 {
text-align: center;
margin-bottom: 40px;
}
input {
display: block;
border: 2px solid #ccc;
width: 95%;
padding: 10px;
margin: 10px auto;
border-radius: 5px;
}
label {
color: #888;
font-size: 18px;
padding: 10px;
}
button {
float: right;
background: rgb(35, 174, 202);
padding: 10px 15px;
color: #fff;
border-radius: 5px;
margin-right: 10px;
border: none;
}
button:hover{
opacity: .10;
}
.error {
background: #F2DEDE;
color: #0c0101;
padding: 10px;
width: 95%;
border-radius: 5px;
margin: 20px auto;
}
h1 {
text-align: center;
color: rgb(134, 3, 3);
}
a {
float: right;
background: rgb(183, 225, 233);
padding: 10px 15px;
color: #fff;
border-radius: 10px;
margin-right: 10px;
border: none;
text-decoration: none;
}
a:hover{
opacity: .7;
}
Save the file name as "Style.css" in Microsoft Visual Studio.
The output for the code looks like following:
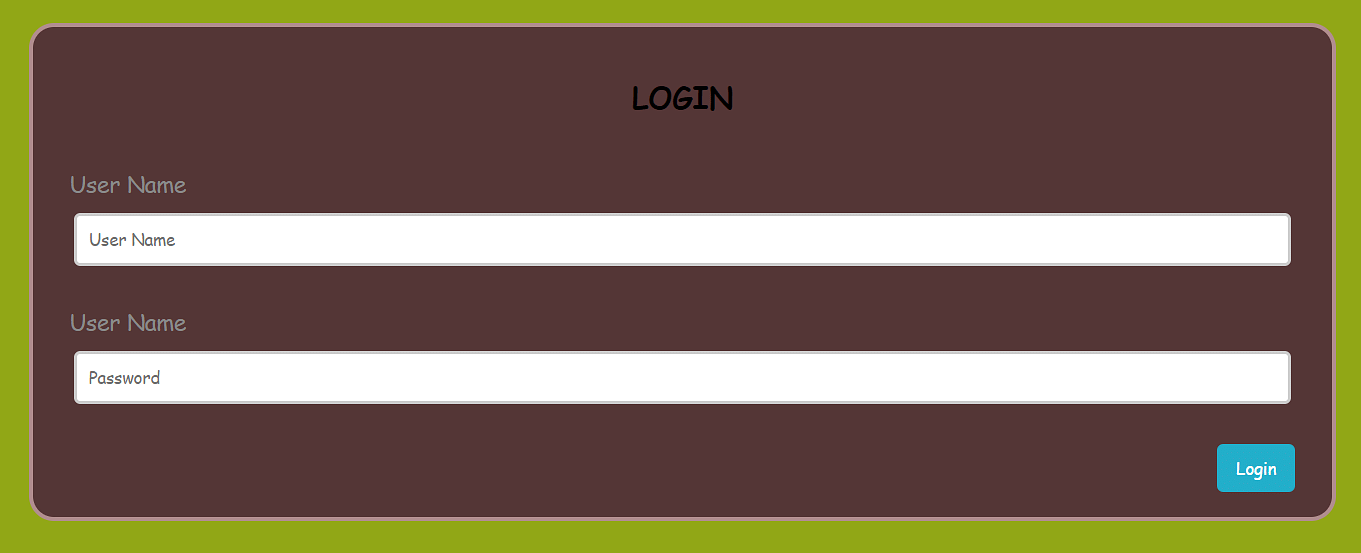
When the user submits the input values, they will be verified against the credentials stored in the database. Here, if the username and password are matched, the user will be taken to the next webpage. Otherwise, the login attempt will be rejected.
Now, to log in, it is important to add the credentials to the database.
Step 3: Create a Database Table Using MySQL
When you create a database, you're creating a structure like this:
|
Name |
Password |
|
Chandler |
Monika@123 |
|
Ross |
Rachel@123 |
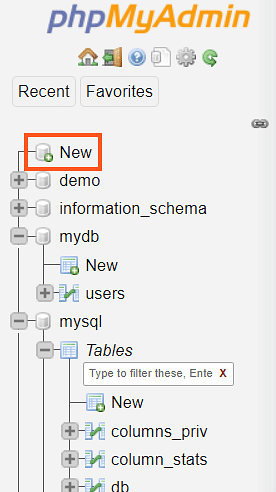
Now, start your SQL Xampp server and select admin. This will direct you to the phpMyAdmin webpage. Now, log in with your username and password.
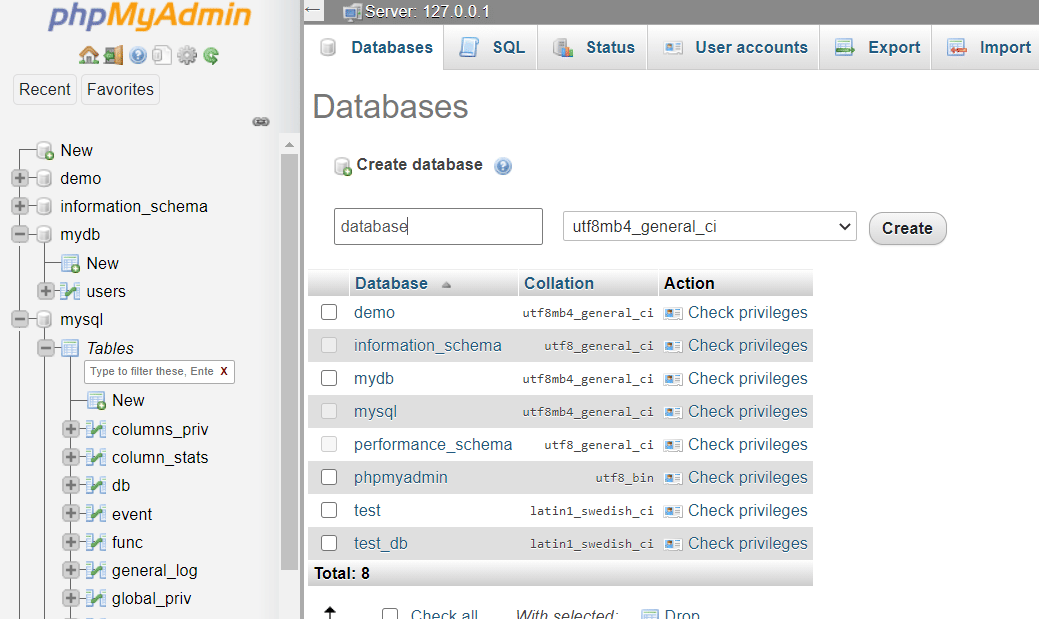
Now, on the MyPHPAdmin, create a new database by clicking "New" on the left-hand side of a webpage.
Next, enter a name for the database where it says "Create database".
Then, you will be directed to the next page where you will create a new table. Now, enter the desired table name.
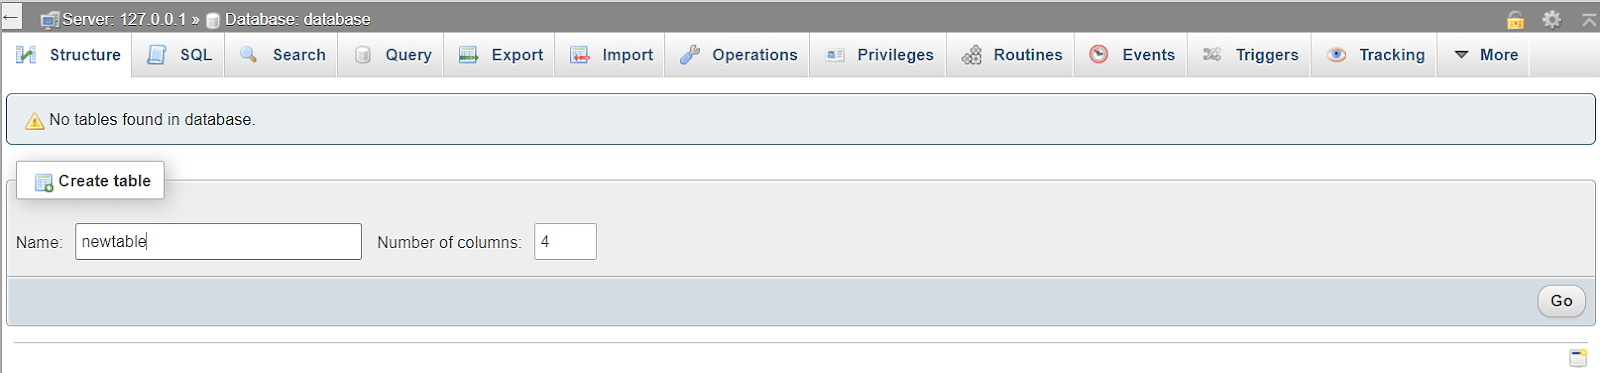
Next, you can select the desired type number for the ‘Fields’ text box.
Note: The fields are the columns; some of the fields are username, password, address, etc. In the text box, enter the number '4'. You can also increase the number based on the requirement.
Once you have completed the steps, click the Go button.
In the type space, select these options.
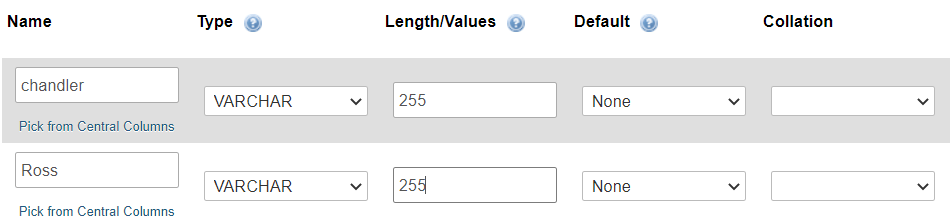
Next, set a primary key for the ID field by selecting the drop-down list option and select save.
Note: Suppose you receive a #1067 error in later versions of phpMyAdmin, change the Default drop-down list from TimeStamp to None.
Once you save this, you will be directed to the structure screen.
This should be the final output:

Step 4: Open a Connection to a MySQL Database
Once you create a PHPMyAdmin database, your next step is to write a code on Visual Studio.
Go to Microsoft visual code -> create a new file and name it as DB connection.
Now, in the code below, you will notice the function mysqli_connect( ). As the name suggests, it does the same task. It connects the database to the form that was created.
<?php
$sname= "localhost";
$unmae= "root";
$password = "";
$db_name = "test_db";
$conn = mysqli_connect($sname, $unmae, $password, $db_name);
if (!$conn) {
echo "Connection failed!";
}
This demo has used an if statement to check whether the code is working or not. A suitable message is printed, depending on if the database was found.
Now, execute the below SQL query to create the user table within your MySQL database.
<?php
session_start();
include "db_conn.php";
if (isset($_POST['uname']) && isset($_POST['password'])) {
function validate($data){
$data = trim($data);
$data = stripslashes($data);
$data = htmlspecialchars($data);
return $data;
}
$uname = validate($_POST['uname']);
$pass = validate($_POST['password']);
if (empty($uname)) {
header("Location: index.php?error=User Name is required");
exit();
}else if(empty($pass)){
header("Location: index.php?error=Password is required");
exit();
}else{
$sql = "SELECT * FROM users WHERE user_name='$uname' AND password='$pass'";
$result = mysqli_query($conn, $sql);
if (mysqli_num_rows($result) === 1) {
$row = mysqli_fetch_assoc($result);
if ($row['user_name'] === $uname && $row['password'] === $pass) {
echo "Logged in!";
$_SESSION['user_name'] = $row['user_name'];
$_SESSION['name'] = $row['name'];
$_SESSION['id'] = $row['id'];
header("Location: home.php");
exit();
}else{
header("Location: index.php?error=Incorect User name or password");
exit();
}
}else{
header("Location: index.php?error=Incorect User name or password");
exit();
}
}
}else{
header("Location: index.php");
exit();
}
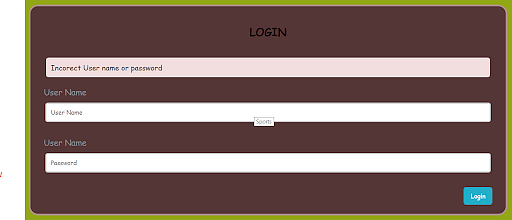
Now, if you log in using the wrong credentials, you will get the following output
Step 5 - Create a Logout Session
In this section, you will create a "logout.php" file.
When a user selects the logout option, the code mentioned below will automatically redirect the user back to the login page.
<?php
session_start();
session_unset();
session_destroy();
header("Location: index.php");
Step 6 - Create a Code for the Home Page
Next, this tutorial will show you how to get back to the home page.
The code for the home page is:
<?php
session_start();
if (isset($_SESSION['id']) && isset($_SESSION['user_name'])) {
?>
<!DOCTYPE html>
<html>
<head>
<title>HOME</title>
<link rel="stylesheet" type="text/css" href="style.css">
</head>
<body>
<h1>Hello, <?php echo $_SESSION['name']; ?></h1>
<a href="logout.php">Logout</a>
</body>
</html>
<?php
}else{
header("Location: index.php");
exit();
}
?>
Looking forward to becoming a PHP Developer? Then get certified with the Advanced PHP Development Course. Enroll now!
Conclusion
This brings us to the conclusion of the PHP Login Form tutorial. Here, you learned how to create a PHP Login form, to create a CSS sheet for the website, how to create a database, and code for the Database connection on Microsoft Visual Studio. Learn PHP form validation in our next lesson.
Are you planning to take the plunge and do a course on PHP? In that case, Simplilearn’s PHP course would be an excellent choice. The PHP certification covers all the fundamental and advanced concepts in PHP, making your journey towards learning PHP an easy one.
Do you have any questions for us? Please feel free to put them in the comments section of this tutorial; our experts will get back to you at the earliest.