
Imagine you want to create a webpage with a regular, commonly used design. What if you already had the template at your disposal? Wouldn’t it be easy for you just to customize and code it according to your requirements? Enter Bootstrap. This article on Angular Bootstrap will show the step-by-step procedure to embed Bootstrap into your Angular application and create an interactive web page.
What is Bootstrap?
Bootstrap is a powerful toolkit, a collection of HTML, CSS, and JavaScript tools to create and build responsive web pages and web applications. Bootstrap is a free and open-source project hosted on GitHub and created by Twitter.
In short, Bootstrap is an extensive collection of reusable, handy bits of code written in CSS, HTML, and JavaScript. It is also a front-end development framework that enables developers and designers to build fully responsive websites quickly.
Bootstrap is extremely popular, currently used by over 27 percent of JavaScript-based websites.
Now that you know a bit about Bootstrap’s basics let’s see why it gets so much love.
History of Bootstrap
Bootstrap was developed at Twitter by Mark Otto and Jacob Thornton, and released in August 2011 on GitHub as an open-source product.
Bootstrap 2 was released in 2012, followed by Bootstrap 3 in 2013. Bootstrap 4 came out in 2018. Bootstrap 5 is currently in beta.
In June 2014 Bootstrap was the Number One project on GitHub.
Why Use Bootstrap?
- Bootstrap offers responsive CSS that adjusts to phones, tablets, and desktops. Bootstrap is also cross-browser compatible and is supported by Chrome, Firefox, Internet Explorer, Safari, and Opera.
- Bootstrap needs minimal setup and can create a functional layout in less than an hour. You don’t have to spend your valuable time creating anything from scratch.
- You don't need to be proficient at HTML and CSS to use Bootstrap, although it's a plus if you're a backend developer and need to do some UI changes.
- Bootstrap comes with components you can easily use for your web page, including navigation bars, dropdowns, progress bars, and thumbnails.
- It offers excellent documentation and has a big community.
What is a Responsive Website?
A responsive website automatically adjusts to accommodate different-sized screens and viewports. That means that, no matter what kind of device a user is browsing with, it looks and works perfectly.
Responsive websites are important because they enable a business to successfully reach more types of devices, thus reaching more people.
What is Bootstrap: What Does a Bootstrap Package Contain?
Bootstrap is a toolkit, and consequently features many tools for developers and programmers. It contains HTML, CSS, and JavaScript tools designed to create and build webpages and applications. This includes scaffolding and plug-ins.
Bootstrap also features basic CSS and HTML design templates that feature a good selection of user interface components. These include alerts, buttons and input groups, carousels, dropdowns, forms, Glyphicons, labels and badges, modals, navigation, pagination, progress bars, typography, tables, tabs, and more.
What is Bootstrap 4?
Bootstrap 4 is the current version of the framework (the next version Bootstrap 5 is in Beta testing as of March 2021). Bootstrap 4 features new components, a faster stylesheet, additional buttons and effects, and increased responsiveness.
Bootstrap 4 supports the current, stable releases of all the major platforms and browsers.
Now, in the following section of this what is Bootstrap guide, you’ll understand how to incorporate Bootstrap in your application.
Embedding Bootstrap into Angular
There are two ways to embed the bootstrap library to your application.
- Angular Bootstrap via CDN
- Angular Bootstrap via NPM
Angular Bootstrap via CDN
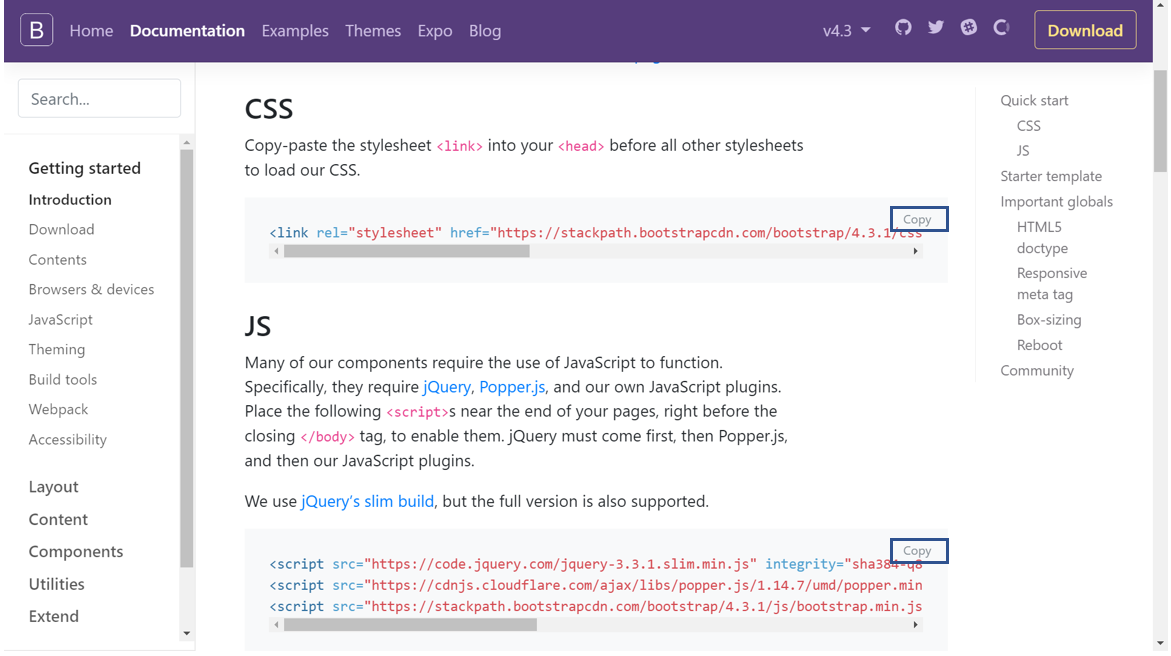
Bootstrap CDN is a public Content Delivery Network. It enables you to load the CSS and JavaScript files remotely from its servers. For that, head to this link, copy the CSS and JavaScript code and paste them in the head and the body sections of the index.html file of your Angular application.
<!doctype html>
<html lang="en">
<head>
<meta charset="utf-8">
<title>Democomponents</title>
<base href="/">
<meta name="viewport" content="width=device-width, initial-scale=1">
<link rel="icon" type="image/x-icon" href="favicon.ico">
<link rel="stylesheet" href="https://stackpath.bootstrapcdn.com/bootstrap/4.3.1/css/bootstrap.min.css"integrity="sha384-ggOyR0iXCbMQv3Xipma34MD+dH/1fQ784/j6cY/iJTQUOhcWr7x9JvoRxT2MZw1T" crossorigin="anonymous">
</head>
<body>
<script src="https://code.jquery.com/jquery-3.3.1.slim.min.js" integrity="sha384-q8i/X+965DzO0rT7abK41JStQIAqVgRVzpbzo5smXKp4YfRvH+8abtTE1Pi6jizo" crossorigin="anonymous"></script>
<script src="https://cdnjs.cloudflare.com/ajax/libs/popper.js/1.14.7/umd/popper.min.js" integrity="sha384-UO2eT0CpHqdSJQ6hJty5KVphtPhzWj9WO1clHTMGa3JDZwrnQq4sF86dIHNDz0W1" crossorigin="anonymous"></script>
<script src="https://stackpath.bootstrapcdn.com/bootstrap/4.3.1/js/bootstrap.min.js" integrity="sha384-JjSmVgyd0p3pXB1rRibZUAYoIIy6OrQ6VrjIEaFf/nJGzIxFDsf4x0xIM+B07jRM" crossorigin="anonymous"></script>
<app-root></app-root>
</body>
</html>
We have highlighted the pasted code for your better understanding.
Angular Bootstrap via NPM
Another way to add Bootstrap to your Angular project is to install it into your project folder by using NPM (Node Package Manager).
npm install bootstrap
npm install jquery
The commands stated above installs the Bootstrap and JQuery libraries. The files, once installed can be found in the node_modules file
- node_modules/jquery/dist/jquery.min.js
- node_modules/bootstrap/dist/css/bootstrap.min.css
- node_modules/bootstrap/dist/js/bootstrap.min.js
Paste the relative paths to these files in the angular.json file, under the build section.
"build": {
"builder": "@angular-devkit/build-angular:browser",
"options": {
"outputPath": "dist/democomponents",
"index": "src/index.html",
"main": "src/main.ts",
"polyfills": "src/polyfills.ts",
"tsConfig": "tsconfig.app.json",
"aot": true,
"assets": [
"src/favicon.ico",
"src/assets"
],
"styles": [
"src/styles.css",
"node_modules/bootstrap/dist/css/bootstrap.min.css"
],
"scripts": [
"node_modules/bootstrap/dist/js/bootstrap.min.js",
"node_modules/jquery/dist/jquery.min.js"
]
},
Now that we have created the initial setup for the application, let’s look at a simple demo to learn how to use the templates and customize them to your requirements:
Demo - Creating an Application With Angular Bootstrap
The first thing to do is find a template you wish to create your application with. You could search Google for “Bootstrap Templates” and click on the links.
We’ve chosen a template from this website. Below, we have added a simple gif showing the process of retrieving the HTML code for the chosen template.

In this demo, we are creating a Simplilearn blog that includes a few links to our courses and the link to our Youtube channel.
Step1: Once you have the code ready, create your Angular application with the following command:
ng create <name of choice>
cd <name of choice>
The HTML code consists of the head section with a couple of meta tags and the heading, and the body tag consists of the different set of code for each part of the application.
You can also find the custom CSS file for the template in the head section. Click on the link, copy the code, and paste it in the styles.css file of your application.
body {
padding-top: 56px;
}
Now that the styling is done, you can copy the entire code in the body section and paste it in your app.component.html file. At this point, you can run your application to see if the template is loaded properly on the browser.
We’re sure that you’re aware the Angular uses the concept of components to define the UI of the application. It’s a better approach to create different components for different UI elements and incorporate all of them in the final HTML file. This also allows you to alter the code without any confusion.
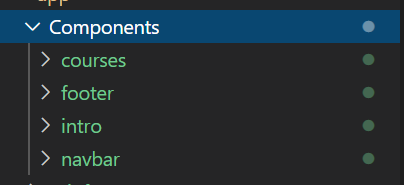
Step 2: Now, we are creating four different components, navbar, intro, courses, and footer. Depending on the template you’ve chosen, you can decide on the number of components you wish to create.
You can cut and paste the code from your app.components.html file in the relevant component’s file.
My navbar.component.html file consists of the code for the top navigation bar.
<nav class="navbar navbar-expand-lg navbar-dark bg-dark fixed-top">
<div class="container">
<a class="navbar-brand" href="#">Simplilearn</a>
<button class="navbar-toggler" type="button" data-toggle="collapse" data-target="#navbarResponsive" aria-controls="navbarResponsive" aria-expanded="false" aria-label="Toggle navigation">
<span class="navbar-toggler-icon"></span>
</button>
<div class="collapse navbar-collapse" id="navbarResponsive">
<ul class="navbar-nav ml-auto">
<li class="nav-item active">
<a class="nav-link" href="#">Home
<span class="sr-only">(current)</span>
</a>
</li>
<li class="nav-item">
<a class="nav-link" href="#">About</a>
</li>
<li class="nav-item">
<a class="nav-link" href="#">Services</a>
</li>
<li class="nav-item">
<a class="nav-link" href="#">Contact</a>
</li>
</ul>
</div>
</div>
</nav>
We want the word Simplilearn to appear on the bar, and as a result, we’ve added it in the code. You can alter the code according to your requirements.
The Intro section of the blog has the following code:
<!-- Page Content -->
<div class="container">
<!-- Heading Row -->
<div class="row align-items-center my-5">
<div class="col-lg-7">
<img class="img-fluid rounded mb-4 mb-lg-0" src="assets/Logo.png" alt="">
</div>
<!-- /.col-lg-8 -->
<div class="col-lg-5">
<h1 class="font-weight-light">World’s #1 Online Bootcamp</h1>
<p>1,000,000 careers advanced <br>
1,000 live classes every month <br>
85% report career benefits including promotion or a new job</p>
<a class="btn btn-primary" href="#">Explore Programs</a>
</div>
<!-- /.col-md-4 -->
</div>
<!-- /.row -->
<!-- Call to Action Well -->
<div class="card text-white bg-secondary my-5 py-4 text-center">
<div class="card-body">
<p class="text-white m-0" style="font-size: xx-large;">Get Certified, Get Ahead with Our Programs</p>
</div>
</div>
Here, we’ve added the Simplilearn logo, and a few lines to be displayed on the user interface.
In the courses component, we’ve added three different courses and the link to the Simplilearn page for the overview of the same. Here’s the code:
<!-- Content Row -->
<div class="row">
<div class="col-md-4 mb-5">
<div class="card h-100">
<div class="card-body">
<h2 class="card-title">Post Graduate Program in Lean Six Sigma</h2>
<p class="card-text">Duration: 6 months <br> Cohort starts: 04 Oct, 2020</p>
</div>
<div class="card-footer">
<a href="https://www.simplilearn.com/pgp-lean-six-sigma-certification-training-course" class="btn btn-primary btn-sm">More Info</a>
</div>
</div>
</div>
<!-- /.col-md-4 -->
<div class="col-md-4 mb-5">
<div class="card h-100">
<div class="card-body">
<h2 class="card-title">Post Graduate Program in Full Stack Web Development</h2>
<p class="card-text">Duration: 9 months <br> Cohort starts: 11 Oct, 2020</p>
</div>
<div class="card-footer">
<a href="https://www.simplilearn.com/pgp-full-stack-web-development-certification-training-course" class="btn btn-primary btn-sm">More Info</a>
</div>
</div>
</div>
<!-- /.col-md-4 -->
<div class="col-md-4 mb-5">
<div class="card h-100">
<div class="card-body">
<h2 class="card-title">Post Graduate Program in Cyber Security</h2>
<p class="card-text">Duration: 6 months <br>Cohort starts: 28 Sep, 2020</p>
</div>
<div class="card-footer">
<a href="https://www.simplilearn.com/pgp-cyber-security-certification-training-course" class="btn btn-primary btn-sm">More Info</a>
</div>
</div>
</div>
<!-- /.col-md-4 -->
</div>
<!-- /.row -->
<div class="card text-white my-5 py-4 text-center">
<div class="center">
<video width="320" height="240" controls style="align-content: center;">
<source src="assets/video2.mp4" type="video/mp4"/>
Your browser does not support the video tag.
</video>
</div></div>
<div class="card-body" id="youtube">
<p class="text-white m-0" style="font-size: x-large; text-align: center;">
<a href="https://www.youtube.com/user/Simplilearn"><img class="img-fluid rounded mb-4 mb-lg-0" src="assets/Youtube.png" width="150px" height="150px"></a></p>
<br><h4>Check Out Our YouTube Channel for Technical Videos and Tutorials</h4>
</div>
<!-- /.container -->
We have also added a video and the Youtube icon that once clicked on navigates to the Simplilearn Youtube channel.
The footer.html file has the following code:
<!-- Footer -->
<footer class="py-5 bg-dark">
<div class="container">
<p class="m-0 text-center text-white">© 2009-2020 - Simplilearn Solutions. All Rights Reserved.</p>
</div>
<!-- /.container -->
</footer>
Step3: The last step is to add the custom HTML tags of the components in the app.component.html file.
<app-navbar></app-navbar>
<app-intro></app-intro>
<app-courses></app-courses>
<app-footer></app-footer>
Step 4: Save the file and run it.
ng serve
Once run, open your browser and navigate to localhost:4200. If another application is running on that address, you can simply run the following command:
ng serve --port
All the changes made to the code will be reflected in the browser. We highly recommend you play around with the code and add other interesting features to beautify your application.
To learn more about what is Bootstrap, enroll for the Post Graduate Program In Full Stack Web Development and gain in-depth knowledge of concepts like TypeScript, Bootstrap Grid System, and more!
Enroll for the Post Graduate Program In Full Stack Web Development and gain in-depth knowledge of concepts like TypeScript, Bootstrap Grid System, and more!
Next Steps
We hope that this article on what is Bootstrap helped you understand how to embed templates into Angular. If you wish to learn Angular and perhaps make a career out of it, certification comes in handy.
Simplilearn's Angular Certification Training Course helps you master front-end web development with Angular. You will learn the knack of creating applications with the help of concepts like facilitating the development of single-page web applications, components, typescript, dependency injection, and directives with this course. The course also includes a real-time project to test your skills.
If you have feedback or questions, drop us a comment in the comments section. Our experts will get back to you ASAP!